Introduction
It’s time for me to take on a new topic on the blog. I have been experimenting, working and blogging a lot about SCCM, Intune and Co-management, but never really touched base with Windows AutoPilot. Time is due and this will be the first in a series of posts about Windows AutoPilot and how to eventually reach Co-management with SCCM and Microsoft Intune through Windows AutoPilot.
First things first though. This post will give you everything you need to know on how to properly get started with Windows AutoPilot. Curious? Read on 🙂
Prerequisites
As usual, a few prerequisites:
- Windows 10 version 1703 or higher
- Specific capabilities requires higher versions of Windows
- Proper licensing for Azure AD and MDM functionality
- Most enterprises having a Microsoft cloud strategy will already comply here, but for specific details, please see: https://docs.microsoft.com/en-us/windows/deployment/windows-autopilot/windows-autopilot-requirements-licensing
- Automatic MDM enrollment enabled for your users
- This is in line with the prerequisites for Co-management in general
- Allow your users to join devices to Azure AD
- Company branding configured in Azure AD
Register devices
Quote Michael Niehaus: “The easiest way to register devices, is to have someone else do it”
First off, there are several and better choices for registering devices into Windows AutoPilot at scale than the scenario I’m covering here, but for initial testing and to get started, this will be sufficient and ideal:
- Download following Powershell script: https://www.powershellgallery.com/packages/Get-WindowsAutoPilotInfo
- Make sure to run the script with elevated privileges and possibly lower the ExecutionPolicy if needed. See below illustration.

- Run the script using the -OutputFile parameter on the device you wish to register into Windows AutoPilot:

Upload the .csv file
- Go to the Microsoft 365 Device Management portal at https://devicemanagement.microsoft.com
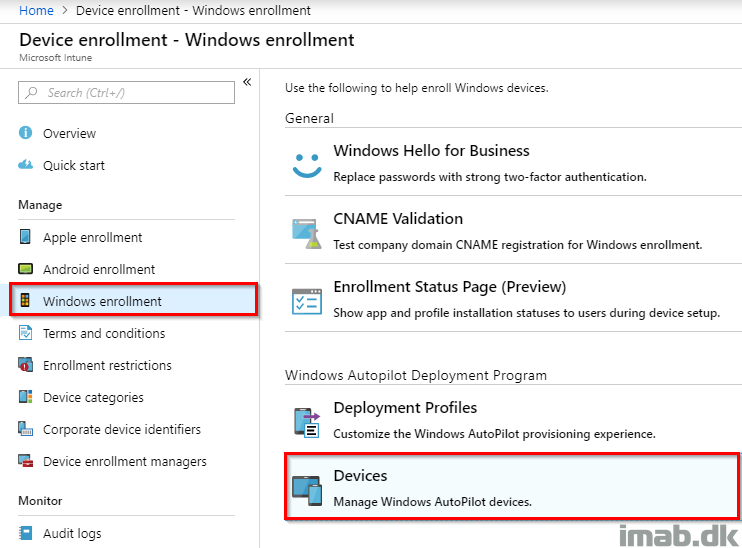
- Navigate to Device Enrollment -> Windows Enrollment -> Devices. See below illustration:
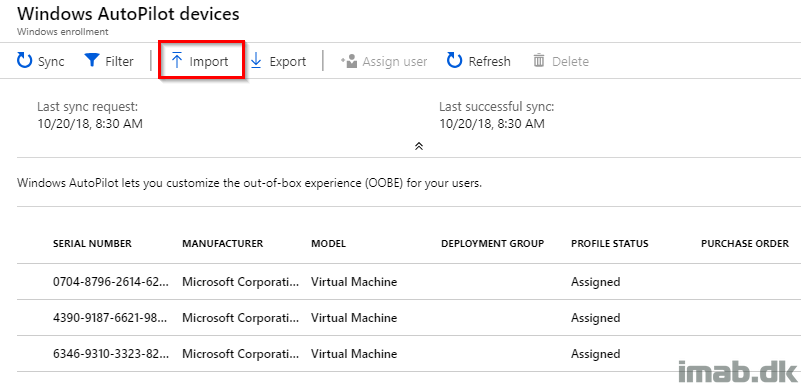
- Click Import
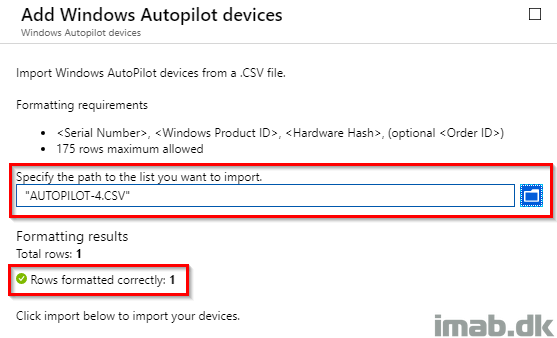
- And browse to the .csv file created earlier by the Powershell script and import the file. Notice the import can take several minutes to complete
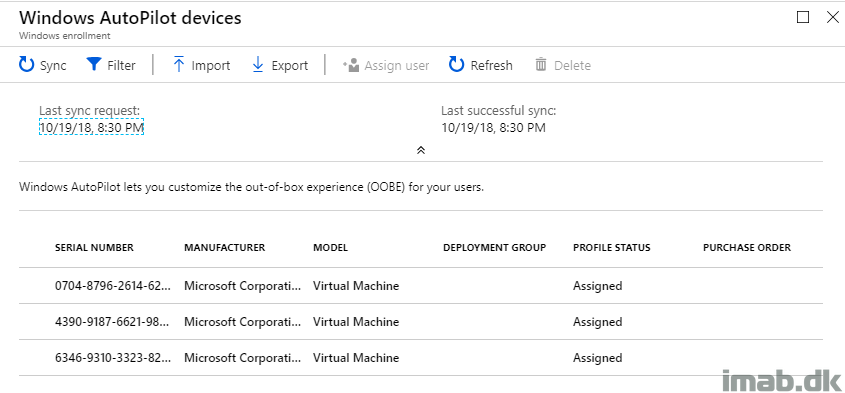
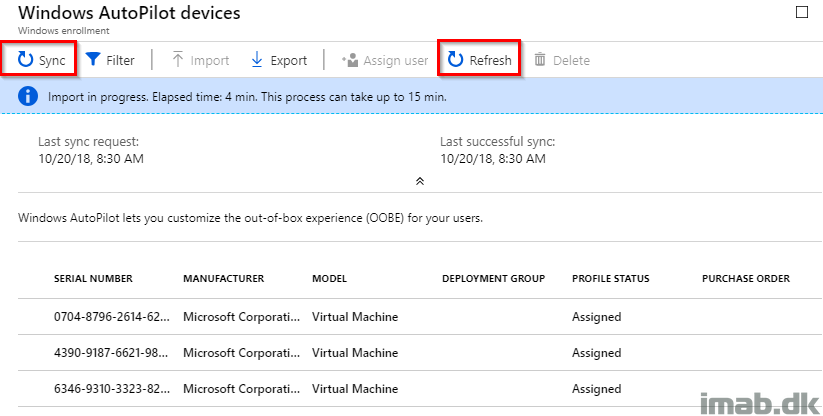
- Once the import is complete, click on Sync and then Refresh once the sync has completed
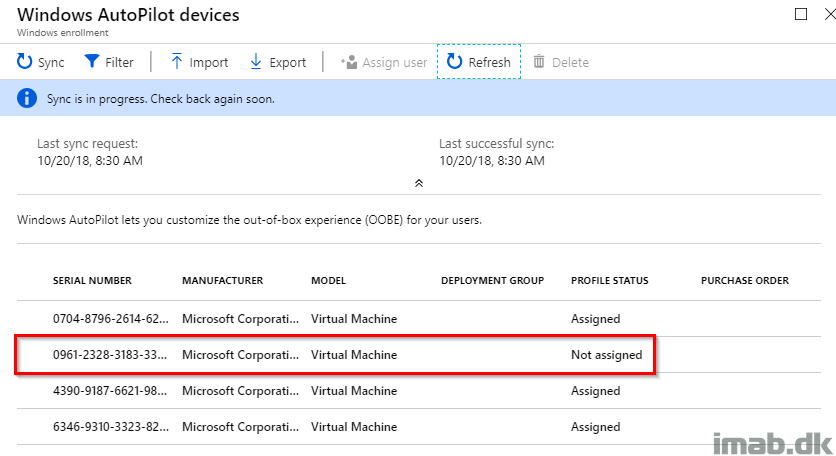
- Notice your new device has been added with a profile status of ‘Not assigned’
AutoPilot device group
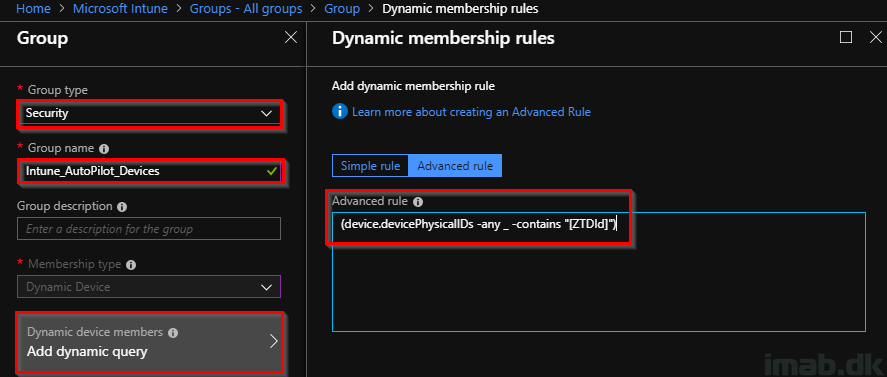
- Next, create a new dynamic security group. This can be done in Azure AD or in Intune in the Azure AD portal: https://portal.azure.com
- Give the group a suitable name. For your inspiration, mine is called Intune_AutoPilot_Devices
- Membership rule: (device.devicePhysicalIDs -any _ -contains “[ZTDId]”)
- Note: This will essentially create a group consisting of ALL AutoPilot devices
Deployment Profile
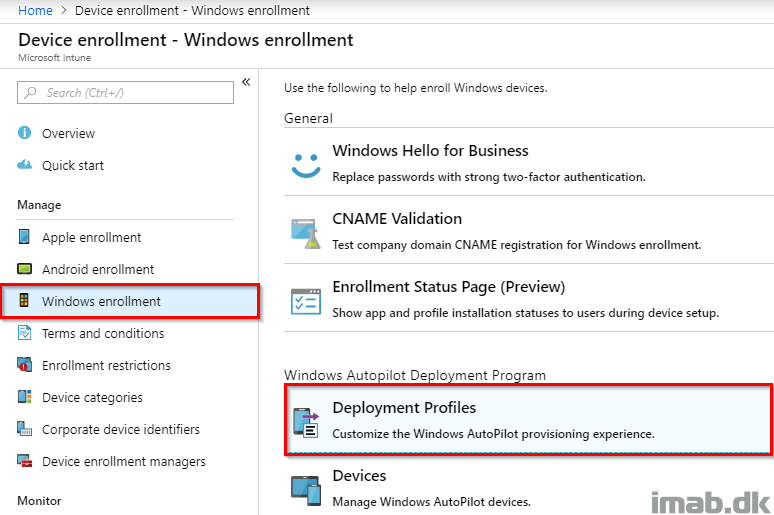
- Back in the Microsoft 365 Device Management portal: Create a new AutoPilot Deployment Profile in Windows enrollment -> Deployment Profiles -> Create profile
- Configure the profile as it suits your needs. Below is an example:
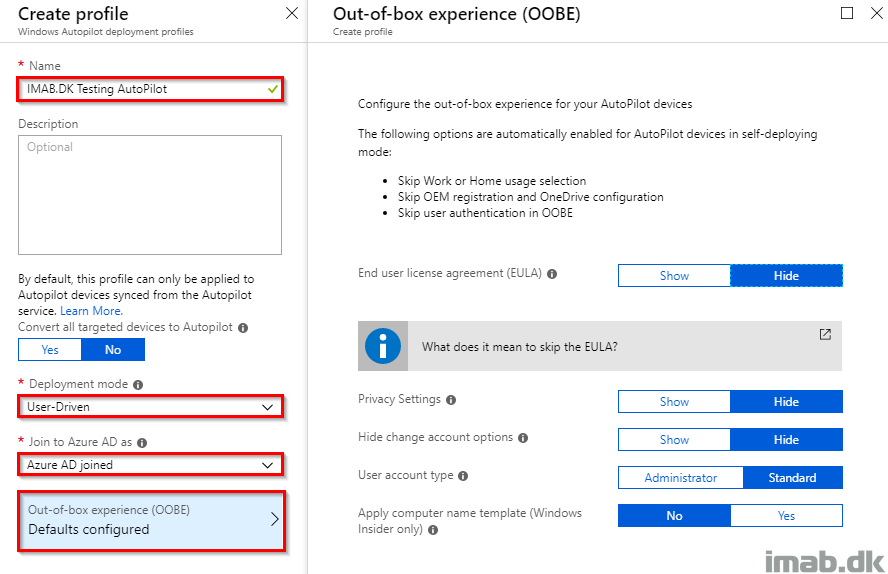
- Assign the newly created Deployment Profile to the group you created earlier:
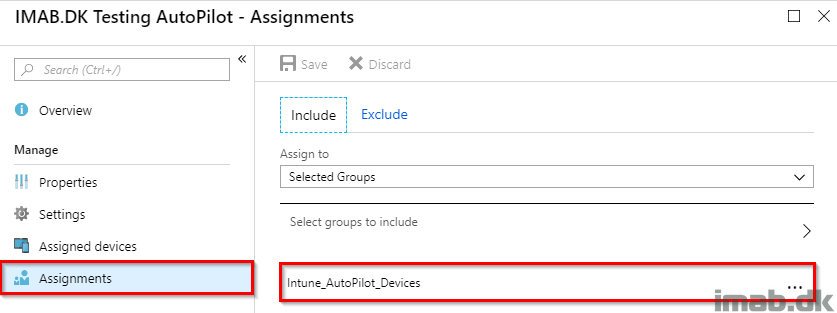
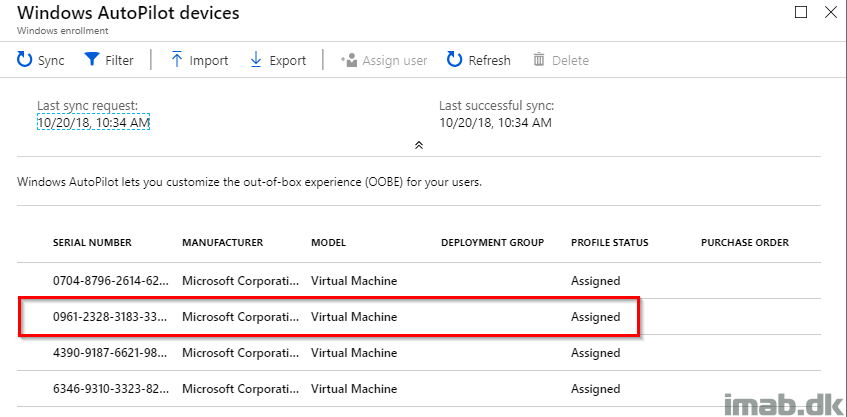
- Now, check back in on your Windows AutoPilot devices and notice your newly imported device now has a profile status of assigned
- This essentially means that every AutoPilot device you ever import or get registered by other means, will have this profile automatically assigned
Enrollment Status Page
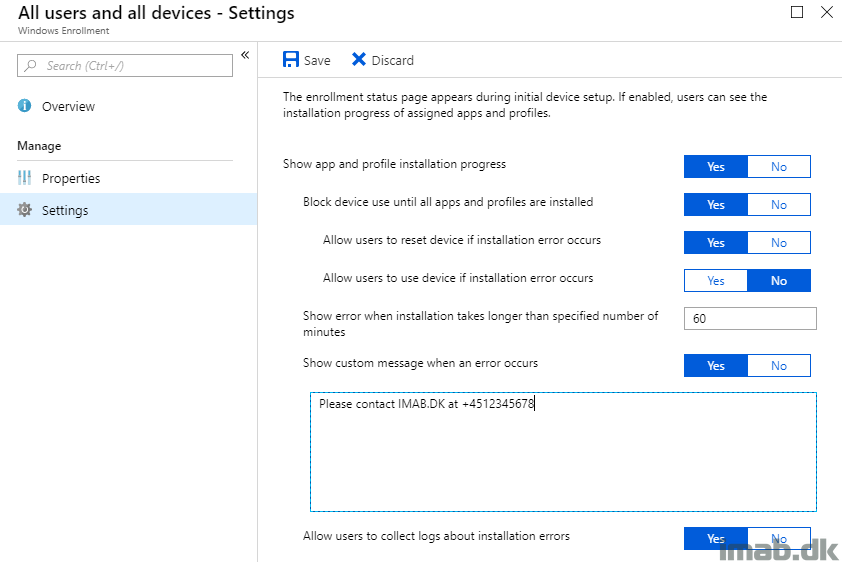
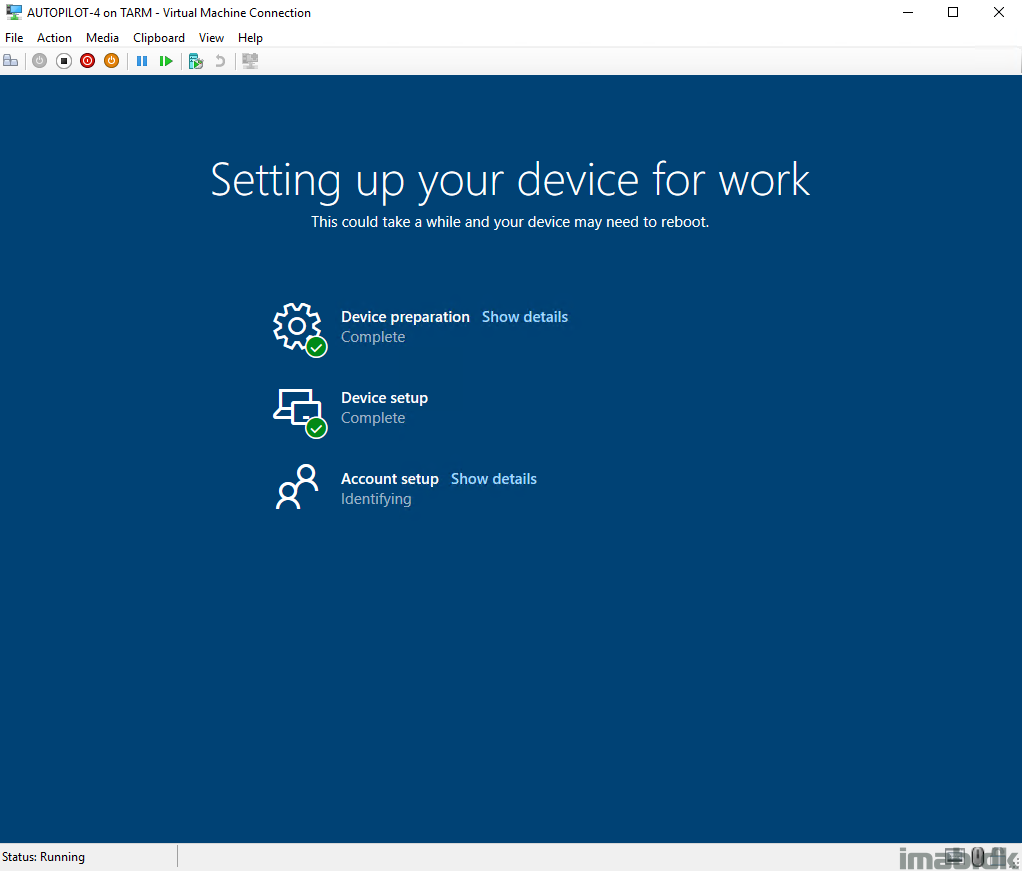
- For further customizing the experience for the end-user, take a closer look at the Enrollment Status Page. Below is the default profile, customized for my needs.
- Note that the enrollment status page only works on Windows 10 version 1803 or higher
AutoPilot in action
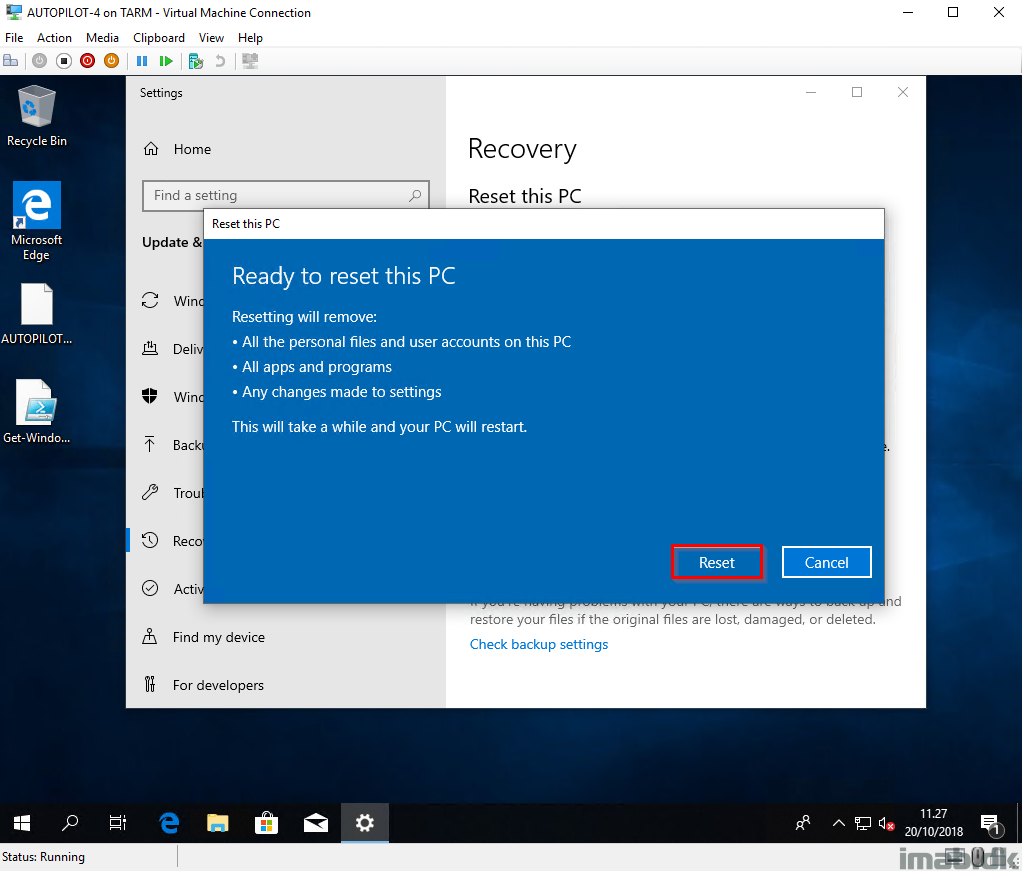
- Reset the device you imported into Windows AutoPilot earlier during this post:
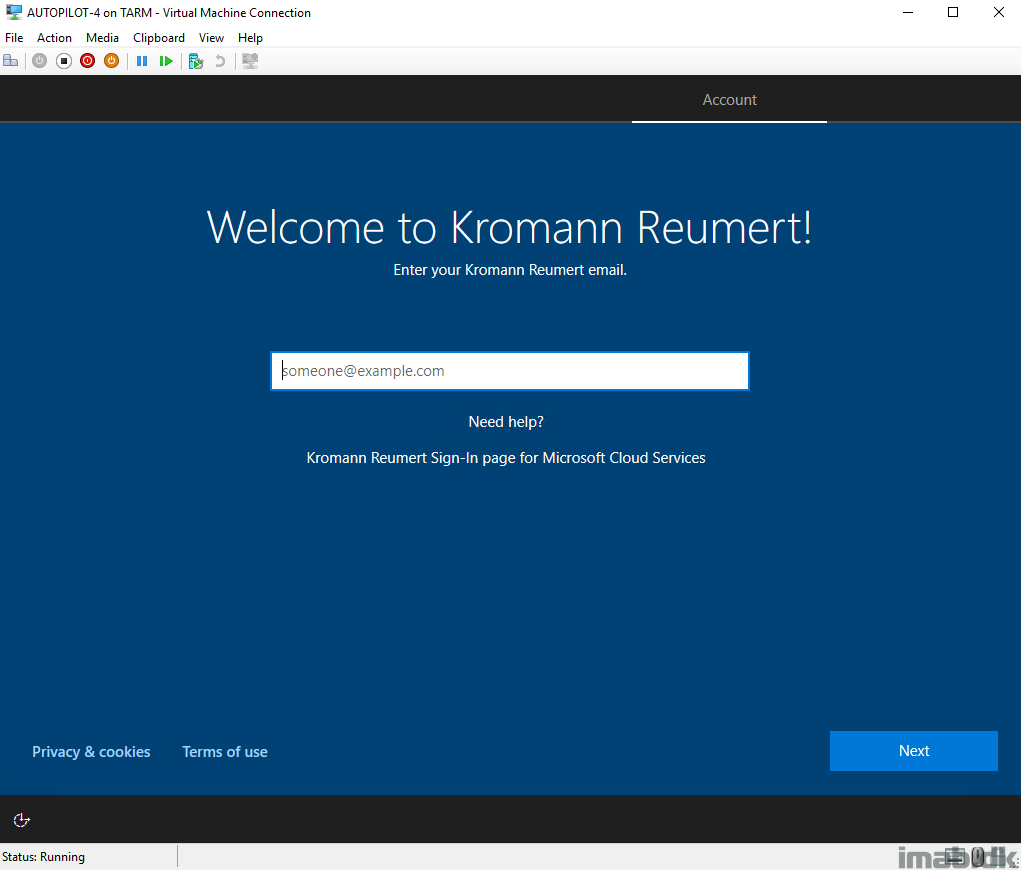
- Walk through the OOBE once again, this time noticing that the device is reaching out to the Windows AutoPilot deployment service:
- And notice the Enrollment Status Page in action as well, making sure that the user is kept on the enrollment process until the device is fully ready:
Administering Windows AutoPilot
As a final note to this post, I’m going to let you know that there are multiple portals from where you can administer Windows AutoPilot devices:
- Microsoft Store for Business
- Was the initial portal for Windows AutoPilot, but everything has since then transitioned into Microsoft Intune
- Microsoft 365 Business
- Primarily for small and medium businesses – less than 300 seats
- Partner Center
- Used by distributors and resellers to add devices into your organization on your behalf
- Microsoft Intune
- This is the only portal you should be using, if you are an enterprise customer
More information
- https://docs.microsoft.com/en-us/windows/deployment/windows-autopilot/windows-autopilot