Note: June 3 2018: This post will be updated as soon as possible with some minor changes and reflect how I do this today 🙂
In this blog post I will go into details about how I flash the BIOS of our Lenovo ThinkPad series during OSD using ConfigMgr.
First off you obviously need to download the latest BIOS from the Lenovo support site: http://support.lenovo.com/dk/en/. In this example I’m flashing the BIOS of a ThinkPad T450s.
Go ahead and locate and download the BIOS Update Utility for Windows. The most recent version as of now for T450s is 1.21:
When downloaded, extract the content to your source file library. In this case I have a folder structure equal to this: D:\Pkgsource\Applications\Lenovo\BIOS\T450S\1.21
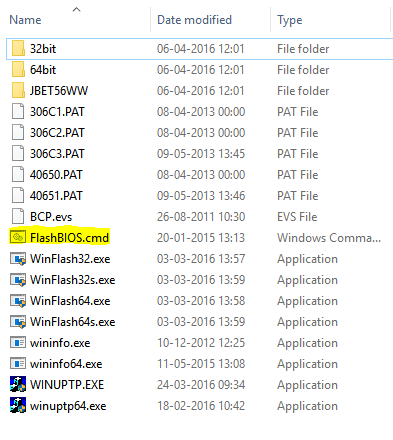
The content of the 1.21 folder should be looking like this:
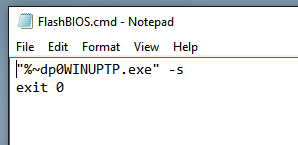
Next, mind the highlighted file: FlashBIOS.cmd. Create this file manually with following content (I exit the script with exitcode 0, as the BIOS update itself might return exitcodes seen as failures. Some might dislike this approach, but you can also translate the actual exitcode into zero using whatever method you prefer):
“%~dp0WINUPTP.exe” -s
exit 0
With this in place, go ahead and create a package in ConfigMgr with above content and distribute the package to your distribution points (I’m not going into details on this one, as this is pretty standard).
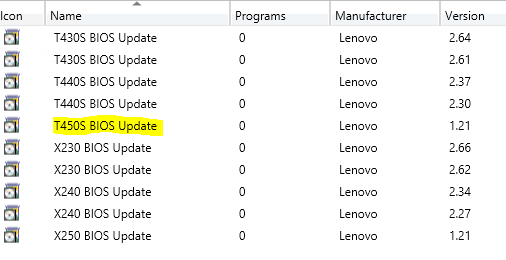
My packages in ConfigMgr looks like this (I have highlighted the package used in this example):
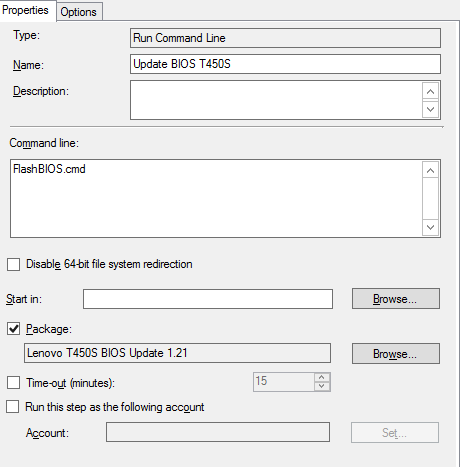
Next we will be using the package in our task sequence in a step of Run Command line. This is done somewhere after the step of Setup Windows and Configuration Manager like this (I put BIOS updates in the end of my task sequence as they require reboots):
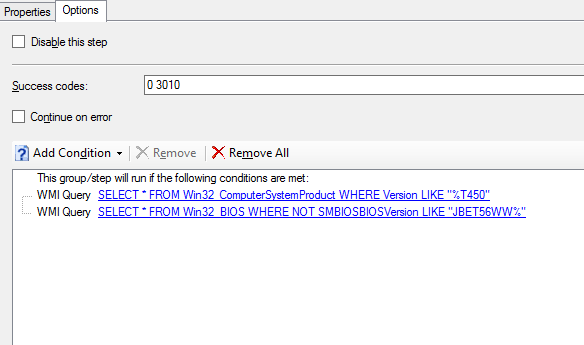
As updating the BIOS to this specific version is a onetime operation, you would want to add following conditions to the Options tab:
This will make sure that the step is only run when a Lenovo Thinkpad T450 is being deployed AND when the BIOS is not already the most recent version (no need to run the step again, if the same laptop should be reinstalled in a near future)
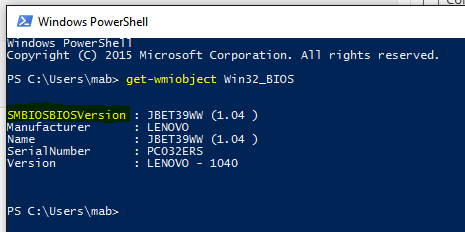
You can run following powershell commands to display the computermodel and what BIOS version that currently is installed:
Get-WmiObject Win32_Computersystem
Get-WmiObject Win32_BIOS
Enjoy 🙂

similar to a technique that I worked with Mikael Nystrom to develop a few years back. I actually don’t do it quite this way anymore.
What way are you doing it
So this means when 1.22 is released and a machine arrive with 1.22 it will try to update with 1.21 due to the WMI query? so your suggestion works great as long as you are on your toes with updating BIOS as they are released?
thanks for good post!
I followed this guide and when it gets to the step in the task sequence I get a 0x1 error. Any ideas what would cause the error?
Hey, not just like that. I’m today still using this method without issues. I would need to confirm alot of things on your end to give an educated guess I’m afraid. Some of the early models, like T410 and T420, wanted the BIOS update to happen PRE WinPE. What model are you facing troubles with?
Why not just add the correct success code to the options instead of creating a cmd file to return 0?
Thank you for your post. I had been struggling with this for a long time. I was following the article posted on the Lenovo web site…
I found your post and it worked the first time!
Thank you so much.
Hi Martin,
Great article !
I was wondering if this method is still the preferred method of updating BIOS in OSD ?
Kind regards
Jacob